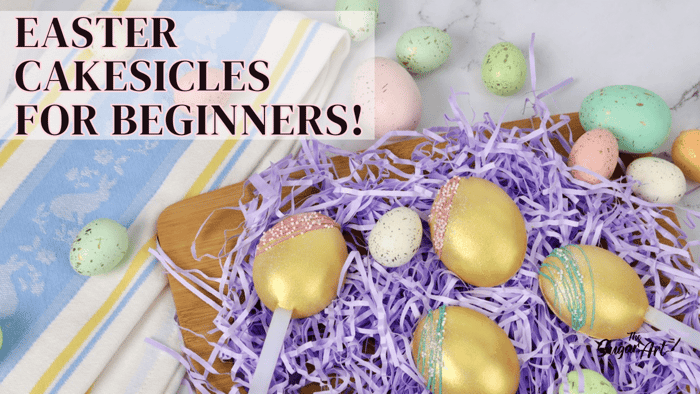
Making cakesicles is not easy, but here's a quick tutorial on how to make cakesicles for beginners! Like me, lol.
FIRST, USE VODKA FOR THE MOLD!
Adding a little amount of vodka to your cakesicle mold will ENSURE the chocolate comes out super shiny! The mold itself needs to be very clean as well, so take the time to do this step well. It will be worth it!
SECOND, CAKESICLE FILLING
There are so many tutorials on how to make fillings for cakesicles, cake pops, etc - but essentially it is just a fully baked cake and icing mixed together! There are some who will actually bake their cake, pull it out of the oven, add a tiny amount of Vanilla Extract (or whatever flavor you choose) and mix the cake with the paddle attachment until you have a dough consistency. We personally feel it's better to have the baked cake mixed with prepared buttercream frosting, plus it's a little easier, however - it is a sweeter taste when you do it this way!
Try all the different techniques out there and be sure to check out the video below, when we attempted Halloween Cake Gems!
HALLOWEEN CAKE GEMS VLOG (CLICK HERE)
AND LAST, GOLD LUSTER DUST!
These cakesicles turned out so gorgeous, they are the "goose that laid the golden egg" - haha! Golden Eggs are so perfect for Easter and we have a very easy technique for you, too! Follow the instructions in the above video and check out these other tutorials below as well:
APPLYING LUSTER DUST TO CHOCOLATE (CLICK HERE)
And you definitely need to try THE COLOR SOLUTION (click here) and WEDDING GOLD (click here) for so many confections!
THANK YOU!
Be sure to tag us if you try any of our confections in all of your social media posts too! Click all links below to follow!